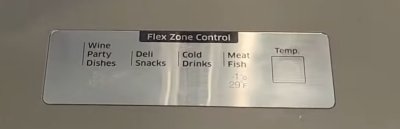
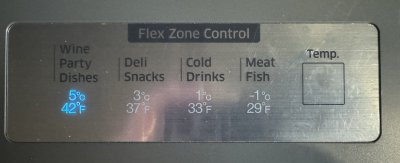
Details on Replacing the Flex Drawer Cable
1 NOTE: The flex drawer cable assembly is all low voltage.
You should be safe in doing all this activity without turning off the power to the refrigerator.
Before beginning, lift the tray out of the Flex Drawer.
You may wish to place the food items in the top of the refrigerator or in an ice chest.
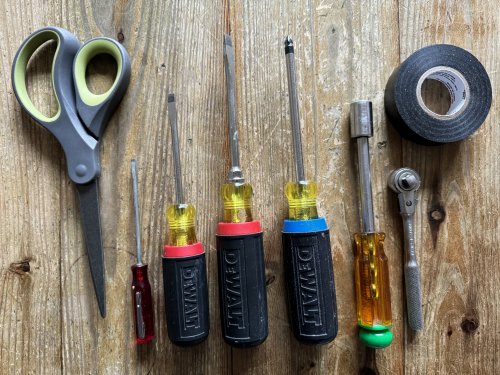
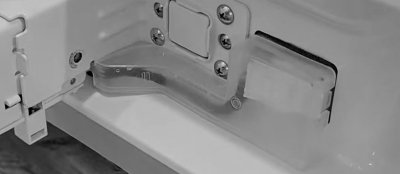
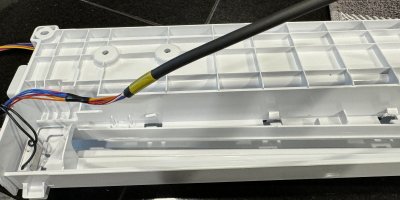
On the right side of the drawer, pry off the plastic cable cover, using a flat head screwdriver.
|
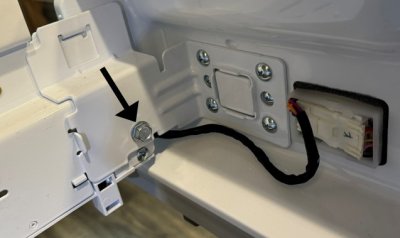
2 Here is the cable underneath.
Unplug this cable by pushing the middle tab downward.
Now remove the door. It is held by two 10 mm bolts. The right side one is indicated by the
black arrow.
|
 |
 |
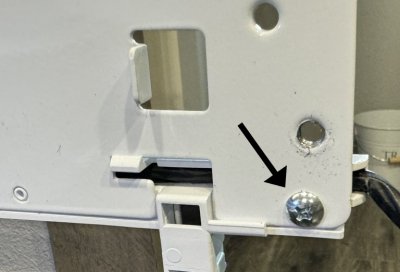
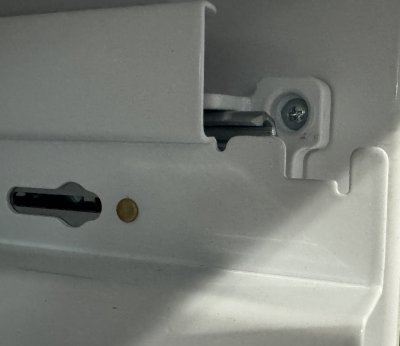
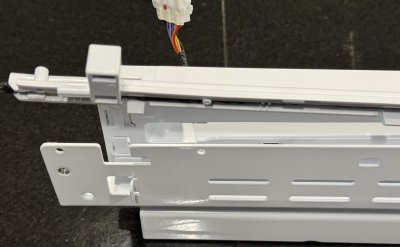
3 Remove this screw on the front of the
right track.
|
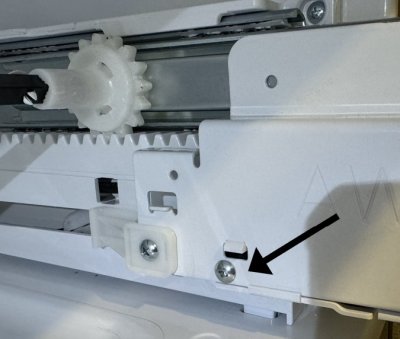
4 Remove this screw on the back of the
track. These two screws hold a smaller channel, which is shown in 10
below. It is also retained with a few clips. You can remove the smaller channel once you have taken out
the whole right track assembly in step 6.
|
 |
 |
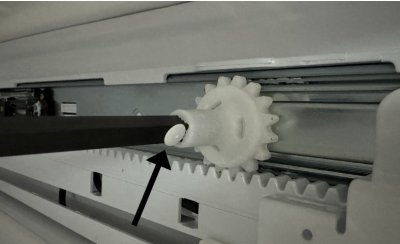
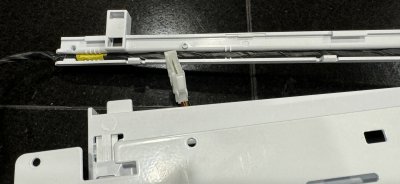
5 Now remove the long black bar between
the nylon wheels. As shown by the black arrow, there may be a white nylon piece, which will come out by
prying with a small screwdriver.
Now push the black bar into the right nylon wheel, allowing the left side to come out of the left nylon
wheel. Set aside the long black bar.
|
6 Slide both tracks fully in, and remove
this screw (toward the front).
The right track assembly can now be removed by pulling it forward. Disconnect the cable here first.
|
 |
 |
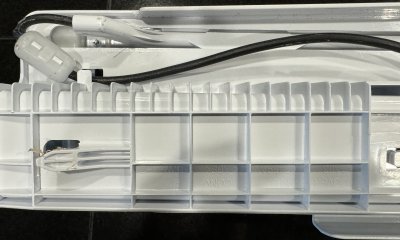
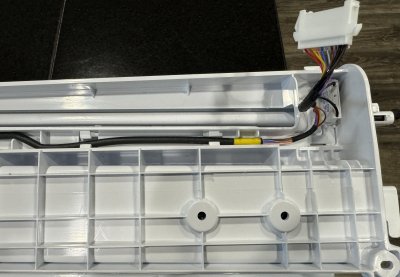
7 Just for your own reference, you might
take some pictures of how the existing cable is routed. Here is the front side.
|
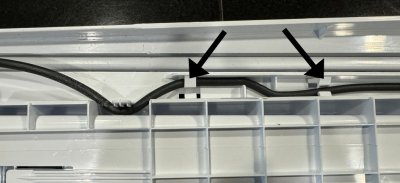
8 And here is the middle section.
Note the two sets of cable retaining tabs marked by the arrows. These are an example of manufacturing techniques that
are easy to make but hard to service! You will have to try to hold the tabs apart while trying to pull the
existing cable out, later in step22.
|
 |
 |
9 And here is the back side section.
|
10 You can now snap the small channel out.
It's held by 2 or 3 tabs which insert into the track assembly.
|
 |
 |
11 Part of the cable is tucked into the
small channel, as shown here.
|
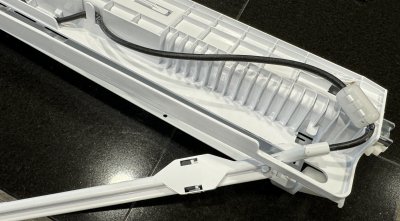
12 With the small channel tilted
out of the track assembly, you can see the section of the cable which does all the flexing when the drawer
is opened and closed. Note the big nylon cylinder.
|
 |
 |
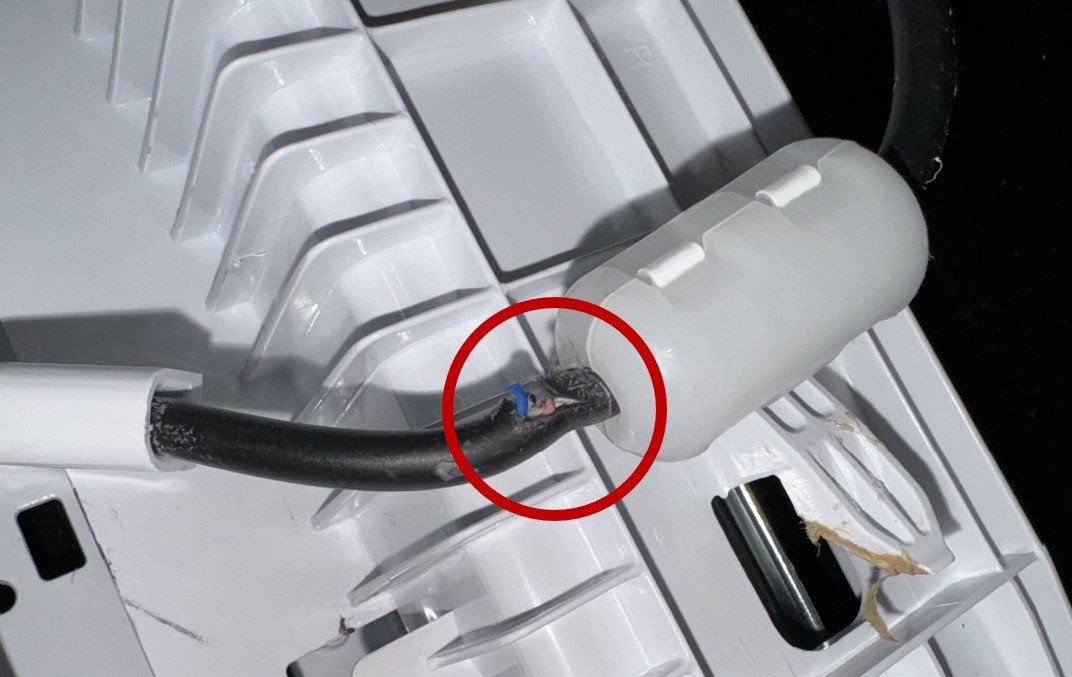
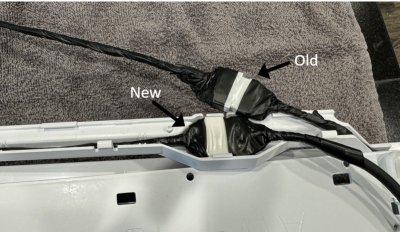
13 It's probably safe to
assert that this nylon cylinder is a flawed design. Maybe it was supposed to keep the cable
bound in place, but as shown here, It forced the cable to flex sharply on each side of
the cylinder. Se we are not going to put this cylinder back when installing the new cable!
|
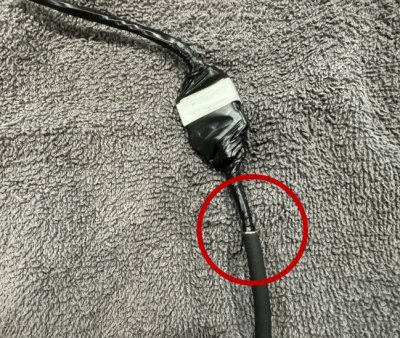
14 Two extra steps. On the new cable,
the sheathed part meets with the thinner, tape-wrapped part. To help reinforce this joint, we
wrap it with black electrical tape, See the next picture.
|
 |
 |
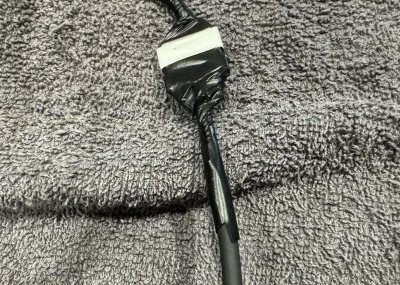
15 We have wrapped the joint with
electrical tape.
|
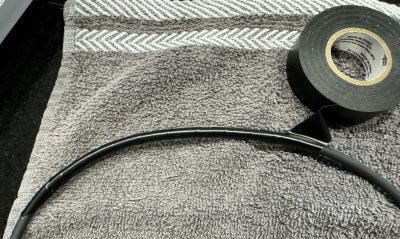
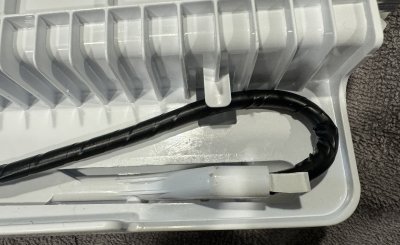
16 For the section of the new cable
that does all the flexing (the section that had the nylon cylinder on the old cable), we wrap the whole section
a layer of black electrical tape. And, yes, we are not installing the cylinder on the new cable. . .
|
 |
 |
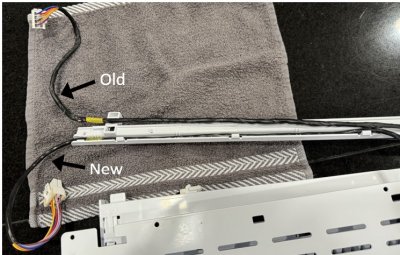
17 Begin to install the new cable.
Lay the new cable next to the small channel. Take out the old cable and snap the new cable in place.
By removing and replacing the old cable a section at a time, we can more easily keep track of how it was routed!
|
18 Here we have replaced the wrapped connector in
the small channel.
|
 |
 |
19 Position the small channel such that the
curved section protrudes into the main track assembly, and reattach the small channel with the two screws.
Note the small piece of white material sticking out. It serves as a "gasket" to keep the edge of the small
channel from chafing the new cable. Use a piece of cardboard or something similar. I cut a small piece from a
thick picture frame matting.
|
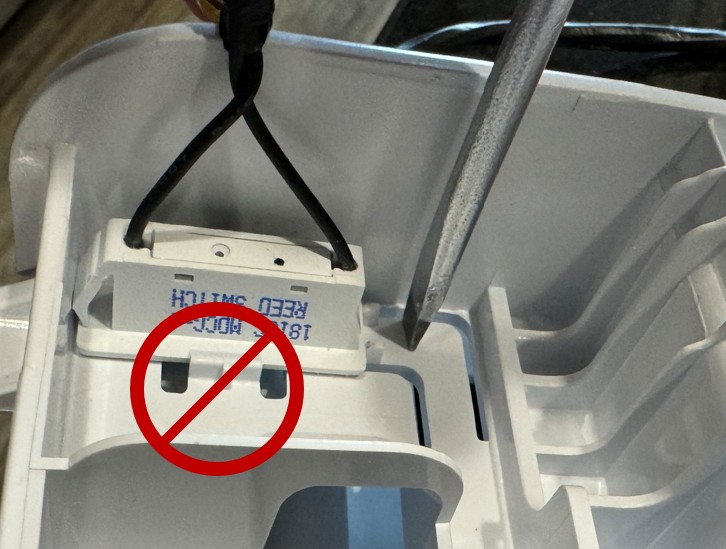
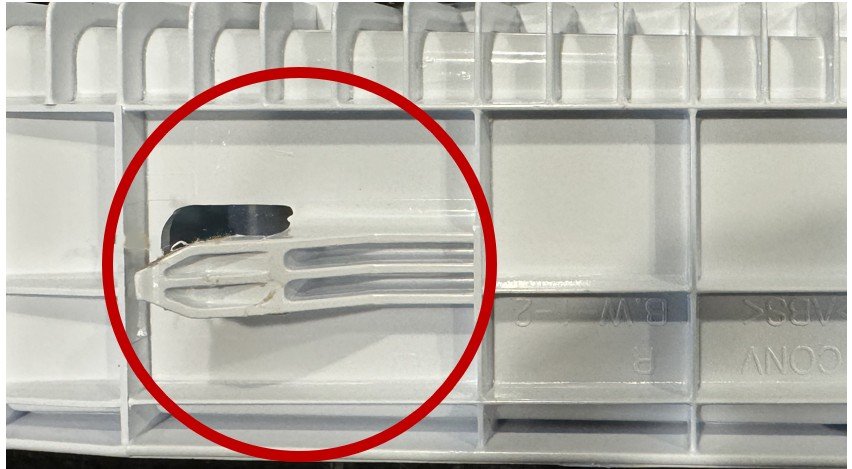
20 Before placing the remainder of the cable
into the track assembly, remove this "Reed Switch" (that is on the old cable) from the track assembly first.
Don't try to pry the tabs out. They will likely break! Instead push down on the L-shaped plastic
"keeper" with a screwdriver. The Reed Switch then will slide right out. (See the next picture)
|
 |
 |
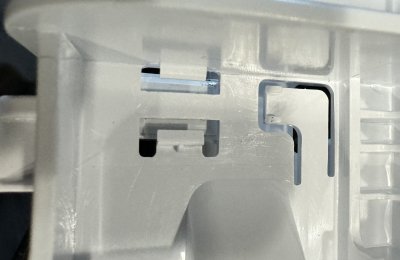
21 You can see the L-shaped "keeper" in
this picture with the Reed Switch removed.
|
22 Now slide the Reed Switch from the new
cable into place between its two retaining tabs. By attaching this Reed Switch now (before routing the remainder
of the cable), you can now tell how to position the remainder of the new cable in the track assembly.
Push it into the cable retaining tabs. (Maybe I should say "what's left of the tabs after you pried the old cable out
of them".)
|
 |
 |
23 Here's what the newly installed cable
looks like when finished.
|
24 NOTE: Although there is only low voltage
present in all the connections you are about to make, if you accidently mis-align the plugs or something like that,
the main circuit board could possibly be damaged. Not likely, but it is still a possiblilty. You could go open the
circuit breaker or unplug the refrigerator at this time.
Slide the right side track into the refrigerator. Note that this (pitiful) tab in the back of the right channel
is what holds the back in place.
Plug the cable connector (seen in the previous picture) into the connector in the side of the refrigerator.
It might look like you can push the whole connection into the cavity of the refrigerator. Well, you can't. So just
tuck the connector into the the open space of the right side track while you push it against the refrigerator.
The front side is secured by the screw you removed in step 6
Screw doesn't line up with the hole? There is a tab on the bottom of the track, toward the front.
Make sure it is lined up with a hole in the bottom of the flex tray cavity. Then the track will fall into place.
|
 |
 |
25 Pull both right and left tracks out
fully. Then push the black square tube into the right side nylon wheel. This should allow the left side to
fit into the left nylon wheel. Push the small nylon keeper into the hole in the tube.
NOTE: At this point you can see the cable loop on the right side. When the tracks are pushed fully in, the
cable loop is inside the right side track. When the tracks are pulled fully out, the cable loop just droops down
inside the refrigerator. Don't think about this too much - you'll lose sleep. . .
|
26 Place the drawer up on the ends
of the tracks. It should fall into place.
Now connect up the new cable and snap the plastic cover into place. No. It's not a very satisfying
"snap". More like "push on various spots until it doesn't fall off". . .
Secure the door with the two 10 mm screws.
|
|
|